HIJAB TUTORIAL FOR CHIFFON SHAWL (PART 8) :)
Assalamualaykum Ladies…
recently, we often hear about chiffon shawl. yeah .. I know, very beautiful. ^____^ from the plain to the motif, verything looks beautiful..
Flowery motif and pastel colors are trending topic  so i give you a tutorial for chiffon shawl. But this time the tutorial are made from me.. yayaya, my self as the model..
may previously have a lot of sharing, but this is my favorite usage. lest try now…
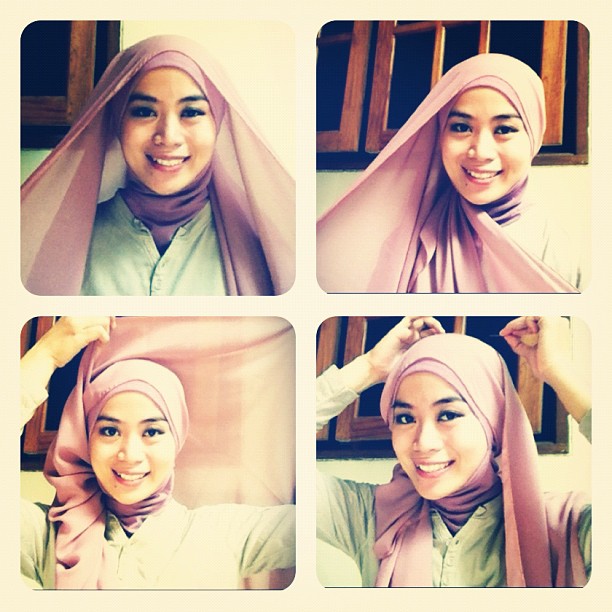
1. Put a shawl over his head, which one is longer than the other
2. take it to one side (shorter side)
3. pull a shawl wrapped around the short side
4. pin in the middle of the back
2. take it to one side (shorter side)
3. pull a shawl wrapped around the short side
4. pin in the middle of the back
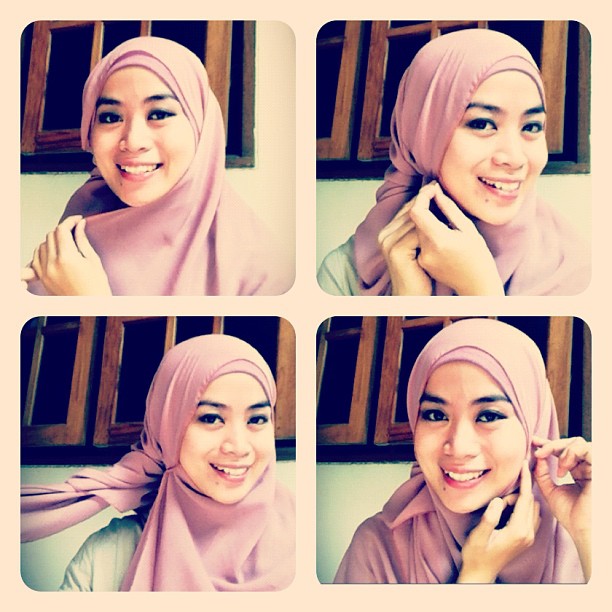
5. pull the shawl longer cover the front of the neck
6. secure with pin, while trimming
7. enter the rest of the long back (may also be given a pin that does not move)
8. secure with pin is also on the other side to make it more presentable
6. secure with pin, while trimming
7. enter the rest of the long back (may also be given a pin that does not move)
8. secure with pin is also on the other side to make it more presentable
Alhamdulillah.. next i will give another tutorial 
thank you for watching me.. ^______^
HIJAB TUTORIAL FOR CHIFFON SHAWL AGAIN!! (^__^) PART 9..
Assalamualaykum Ladies…
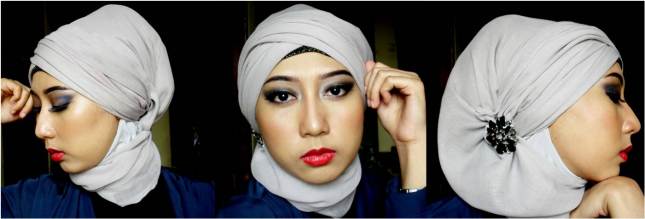
yesterday, i already share chiffon shawl tutorial.. it’s another tutorial may help you to find the suitable one for you..
i’m trying to give you practical and easy tutorial so you can have it in daily use  , it’s truly easy.. i often used for day my day..
follow the step…
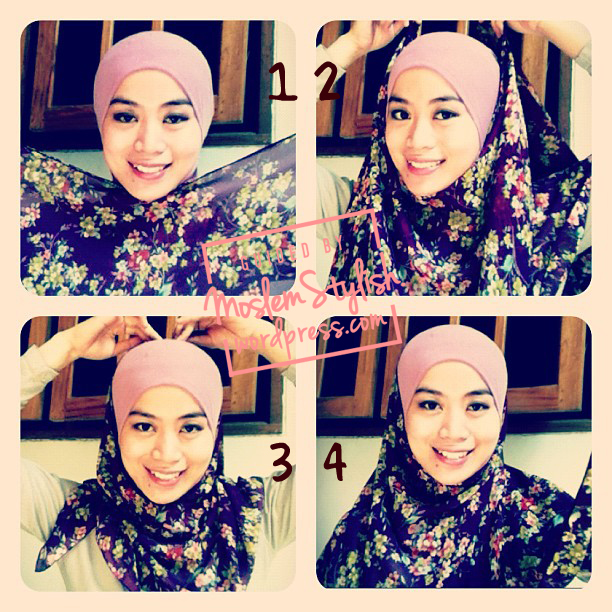
1. take the middle of pasmina
2. drag and take it to the top of the center head
3. secure it with pin
4. take the centar and find the edges
2. drag and take it to the top of the center head
3. secure it with pin
4. take the centar and find the edges
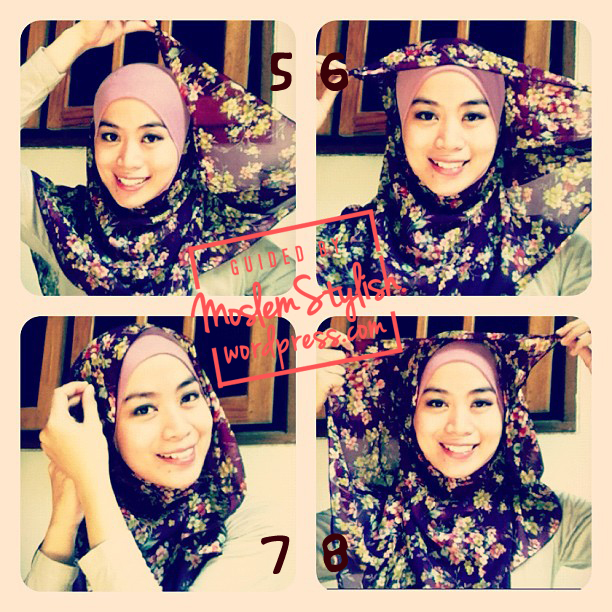
5. bring the edge to the top of head
6. make sure it's pass the center of head
7. Pin it
8. Do the same thing for other side
6. make sure it's pass the center of head
7. Pin it
8. Do the same thing for other side
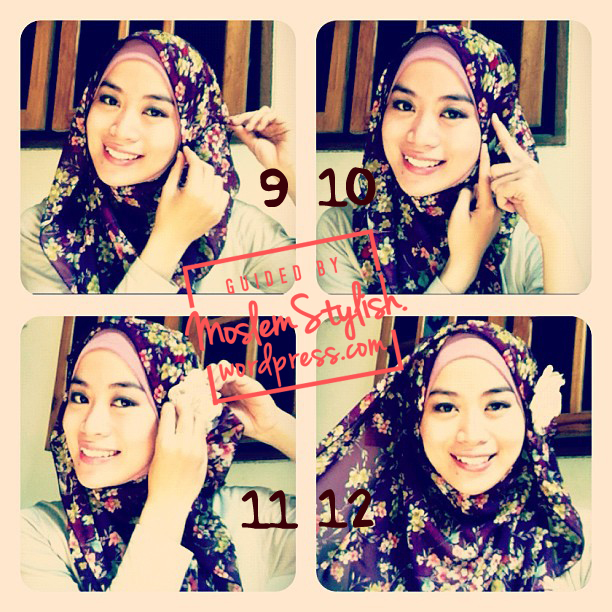
9. make sure it's passed the center of head
10. Pin it
11. Take your brooch
12. make sure neatly on the back
10. Pin it
11. Take your brooch
12. make sure neatly on the back
thank you for watching ladies… as usually, hope o it’s help you to feel so easy to use hijab, and love your hijab.. 
HIJAB TUTORIAL PART SIX :D
thanks to her blog..
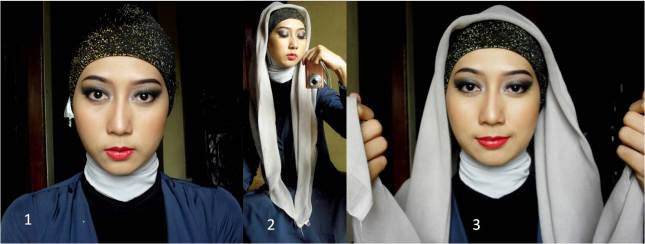
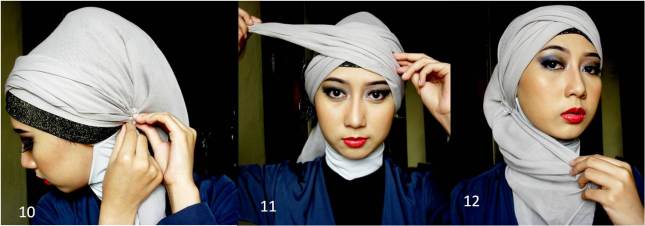
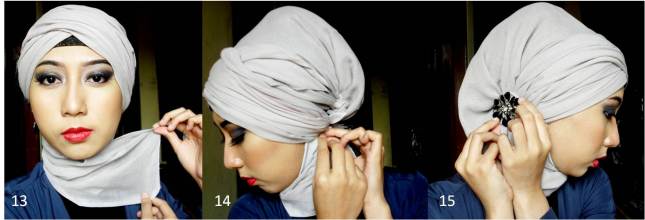
Tadaaaaaa… it’s magic Paris Scarf.. Happy Trying!! \(^o^)/






Tidak ada komentar:
Posting Komentar